
Nothing seems to be more frustrating than when your Internet connection suddenly drops. You are finally going to find out who committed the murder on your favorite show, when the dreaded “Buffering” wheel appears! Oh no!
“What do I do now?”, you ask yourself. Because there are so many components to an Internet connection, it may feel overwhelming at first. Equipped with the right steps and troubleshooting methodology, however, you will be able to get connected again!
In this post, we will explain all the common steps you can try to get back online as quickly as possible.
Go To…
The Simple But Forgotten Stuff
Check Your Computer’s Settings
The Simple But Forgotten Stuff
When a technical issue pops up, you may initially think fixing the issue will be rather complex, and someone well trained will have to take care of it. Those who work in tech know that in some cases, the fixes can be relatively easy and quick.
Your first step when you’re trying to get back online is simply checking that all your networking devices are both powered up and all necessary cables are securely connected. These devices include your modem, wireless router (if you have one), and Ethernet cables.
The best way to make lower the chances of the power supply popping out of any device is to make sure it has some play available. If the plug just reaches where you placed the device and has no play, it may easily pop out in the event someone steps on the wire or something were to fall on it.
As for the Ethernet cables, make sure they have the plug (the clip) on the end. While you can still use the cable without the plug, it won’t take much for the cable to pop out of the port on your modem or router. If the plug has broken off, you can replace the jack with one that includes the plug. Keep in mind that this requires special tools and a lot of patience.
Also, make sure the cables don’t have anything resting on top of them or are being tugged on due to a lack of play available (too tight and are bending at the port).
And finally, try giving your modem and wireless router a power cycle. Unplug the device and leave it unplugged for about 30 seconds. Power cycling a device may fix the issue as a piece of code was possibly stuck or an error occurred where re-connecting stops the issue.
Starting with the easiest and fastest steps not only crosses off one possible cause, but it can also save time in the event a cable or plug came loose and disrupted your connection.
Call Your Service Provider
If everything is plugged in and powered up as expected, try calling your service provider first. Making sure the problem is not on your end first can save you a lot of time and aggravation. If there is a wide outage affecting multiple people, a recorded message should play when you call.
Your provider can also check to see if your modem is acting up*. They can try some troubleshooting steps if a simple power cycle doesn’t work, and schedule for a technician to come if they can not resolve the issue over the phone.
*NOTE: If you bought your own modem instead of renting it through your provider, the provider most likely will not troubleshoot your modem, so you will likely be on your own.
Check Your Computer’s Settings
With Windows computers, you have the ability to enable or disable the WiFi or Ethernet interfaces. Another way to troubleshoot connection issues is to check to see if these interfaces were disabled by mistake. To run these checks, follow these steps:
- Start by typing “network” in the search bar on the bottom left near the Windows button. Click the “View network connections” option.

- In the next “Network Connections” window, you will see a list of icons for the types of networking cards your computer has. These can include the WiFi interface for wireless, the Ethernet interface, and a Bluetooth interface if the computer came with one. If any of these cards are disabled, the icon will show “Disabled” in the second row of text, and have the icons grayed out.

- To enable an interface, right click over the interface you want to bring up, and look for the “Enable” option.

- Once the interface has been enabled, you should see the icon look like the following:

If this fixes the issue, great! If not, continue to the next step. Also, if you have an Ethernet cable plugged in and the Ethernet interface is enabled, and WiFi enabled at the same time, Windows will give preference to Ethernet by default.
Test Cabling
So you see the plugs are in securely and there’s no cables loose. Great, you have finished the first step! Now, you will want to check if any equipment is failing or has completely failed. The first thing you will want to check are the Ethernet cables connecting the devices to your modem. There are plenty of indicators that an Ethernet cable is the culprit.
Your modem has lights within the Ethernet port that will light up when a connection is established to another device (such as a wireless router), as seen below.

If you have a wireless router, you have probably seen multiple lights in the front indicating connections, like the photo below.
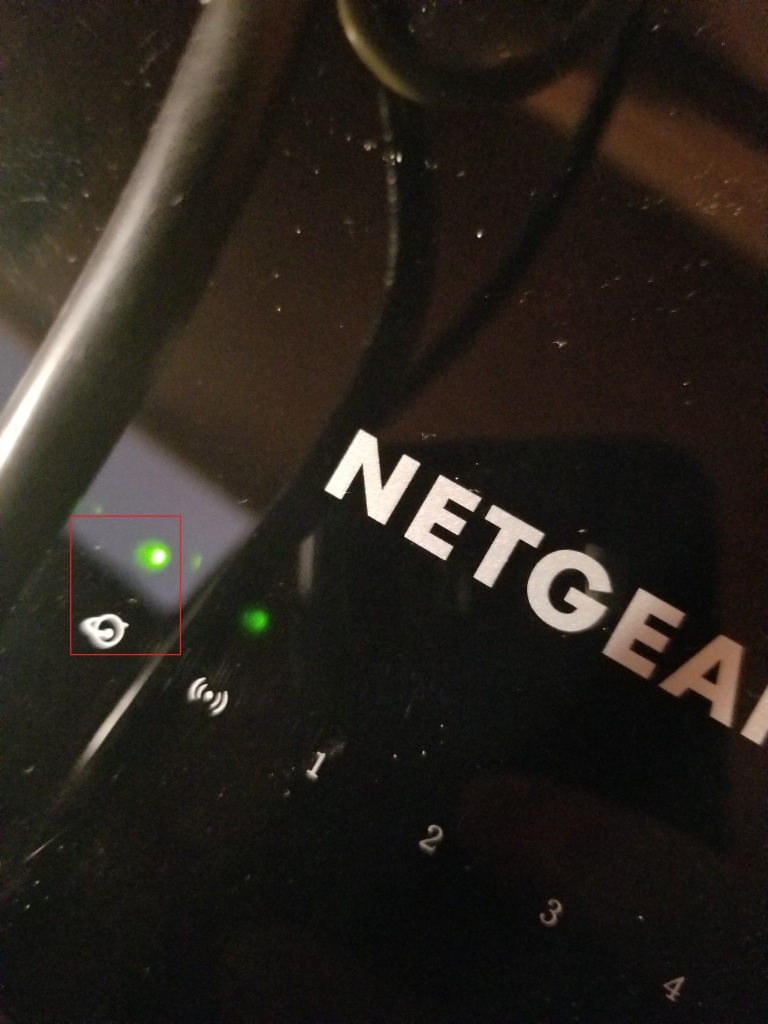
If the Ethernet cables are securely plugged into your modem and the other device you are connecting to and the lights aren’t on, that may indicate the cable is damaged.
Cables that are connected and disconnected frequently, have objects resting on them consistently, or are exposed to hot/damp conditions are likely to have tremendous amounts of wear and tear if they are older.
If you have any additional devices that have an Ethernet port installed, try connecting the cable to that device to make sure the cable is the problem. If the cable works with a different device, it can indicate that the previous device has issues (we will cover investigating wireless routers and other devices in a bit).
Of course, you can always replace your Ethernet cables if you suspect that they are the cause. With changes in standards, you may even get a little more speed, especially if you have upgraded your Internet speed with your provider if you ultimately replace old cabling.
Test Your Wireless Router
So we’ve tried the basic things, checked the networking settings in our computer, and made sure the cabling is not the cause, and still no Internet connection! Now, we will need to focus our attention to the wireless router.
First, check to see if the lights on the router are on and blinking intermittently or staying solid at all times. If all the lights are out, even if you are connected, it could mean the router is on its way out. It is a good idea to consistently check to make sure the lights are working properly, especially if you notice something does not look right.
On other thing to keep an eye on is a drop in speed. If your fast connection starts to slow down, your router might be starting to fail. The best way to make sure that the router is at fault for the slowdown, and not an increase in traffic, is to connect your computer directly into the modem. If your computer does not have an Ethernet port, you can find a USB-to-Ethernet adapter. If the Internet is slow even when connected directly via the modem, the router is not at fault for the speed drop.
If you have any other devices, such as a smartphone or tablet, try connecting to your WiFi network and see if you can access the Internet. If you can, then you can rule out your router as the cause of the issue.
If you still don’t have any Internet after confirming that the router is not the issue, continue to the final step.
Testing Your Devices
So you have tried everything to get you Internet connection back, and still no luck. At this point, you will need to start testing your device to see which component has failed. If you have both Ethernet and WiFi on your device, try each one one at a time. You can do this by disabling one interface while keeping the other enabled. To disable an interface, go to the steps mentioned here and you will see the “Disable” option instead of “Enable”.
If both interfaces are not working, you can try resetting network components and re-installer the drivers Windows uses to make the interfaces operate. To do so, follow these steps:
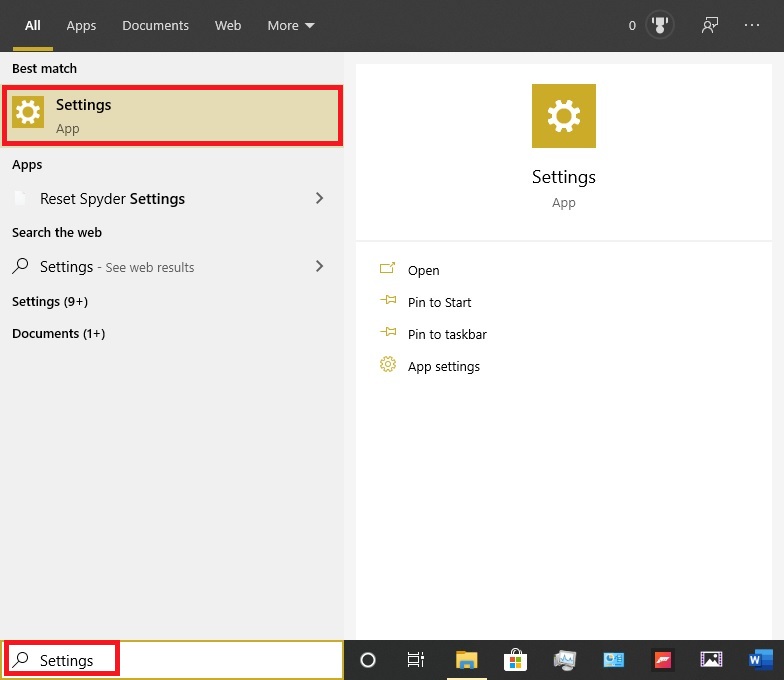
- Start by typing “Settings” in the search bar on the bottom left near the Windows button. Click the “Settings” button.
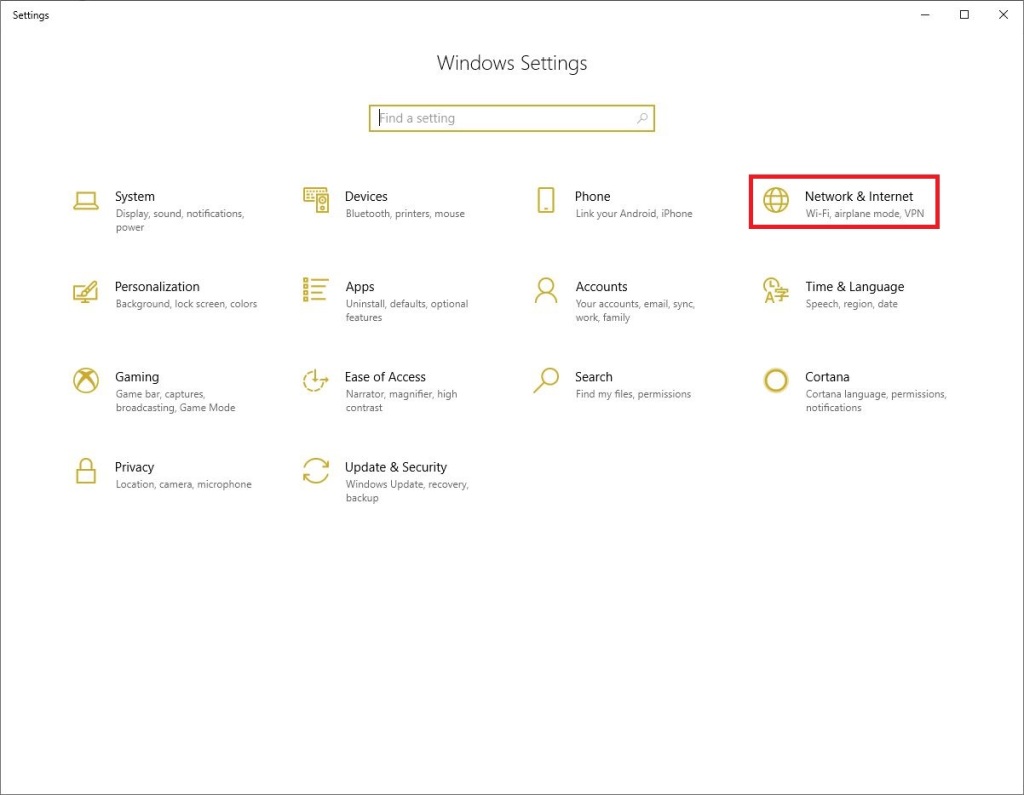
- In the “Settings” window, look for the “Network & Internet” button and click it.
- In the “Network & Internet” window, look for the option “Network reset” at the bottom of the window.

- In the “Network reset” window, press the “Reset now” button. Your computer will need to restart in order to complete the necessary re-install of the drivers.

If you completed all these steps, and still don’t have any Internet connection, you will need to reach out to a technician to help you get back up and running, as the issue may be very complex and require special troubleshooting steps.
Prevention
The best way to keep your Internet connection stable is to be proactive instead of reactive. Keeping the drivers on your computer up-to-date along with updating your router’s firmware can help prevent unexpected issues from happening.
To update the drivers for your computer, you will need to know the name and model number of the network interface you wish to update. You can get this name in the “View network connections” window. To get to this window, start by typing “network” in the search bar on the bottom left near the Windows button. Click the “View network connections” option.
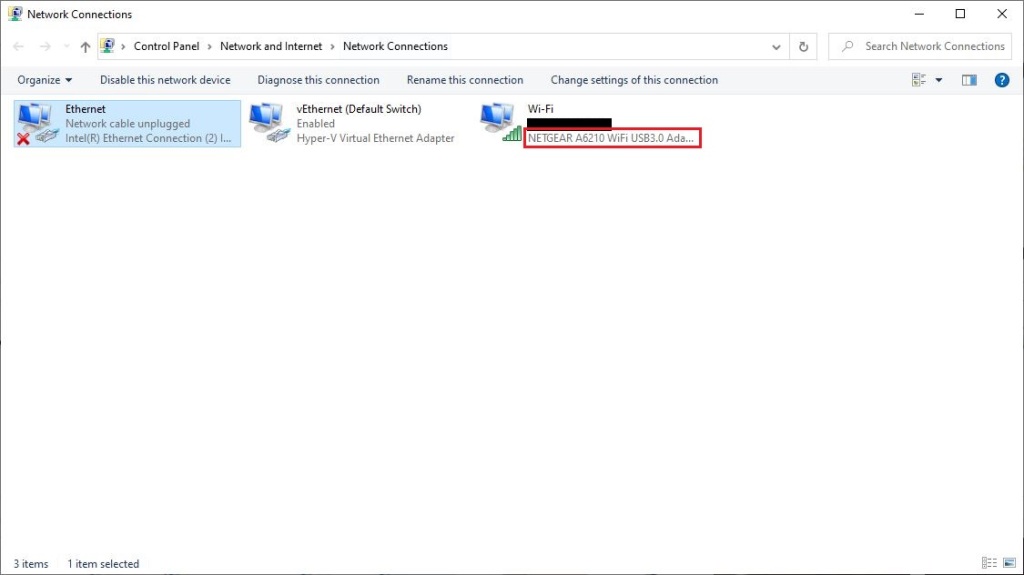
In the “View network connection” window, the Interface manufacturer and the model will be the last line in the icon, as seen below.
The name of the interface will likely be cut off. If that is the case, double click the icon to bring up the “Properties” window, which will have the full name available, as seen below.
Once you have the name of the manufacturer and device, google the complete manufacturer and name along with the word “driver”. You should see the first option lead you to a downloads page that will allow you to install the latest driver version available. Most manufacturers will put a date as to when the current driver version was uploaded.
Once the update is downloaded, double click on the icon to begin the installation of the update. You will likely need to restart your computer for the update to complete.
